Archive for ‘Cake’

April 15, 2013

Lumberjack Cake

by tina

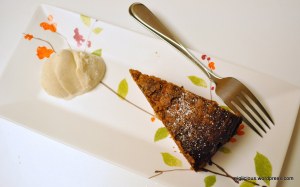
lumberjack01

Such a delicious “healthy” cake!  It’s the first time I baked with actual fruits in the cake batter.  Because there’s fruit in it, I totally feel less guilty after eating multiple slices :)

Recipe adapted from Yummychelle and 7×7.

Ingredients:

  • 1 cup water
  • 1 1/4 cup pitted dates (I used Deglet dried dates)
  • 1 teaspoon baking soda
  • 1 1/4 cup all-purpose flour
  • ¾ teaspoon baking powder
  • ¼ teaspoon salt
  • ½ cup (4.5 ounces) butter, softened (I used European unsalted butter)
  • 3/4 to 1 cup sugar (I used just a little less than 1 cup)
  • 1 egg
  • 1 teaspoon vanilla extract
  • ½ cup (50 grams) coconut flakes (I used just a tad more)
  • 1 pear (bartlett), peeled and small-diced
  • 1/3 apple, peeled and small-diced
  • powdered sugar

Directions:

Soften butter to room temperature by spooning it out into relatively thin slices. It should take about 40 minutes to soften. Do not microwave.

In a saucepan, bring water and dates to a boil for about 5 mins or to the point where some of the water has evaporated and mostly infused with the dates. Also, make sure the dates are boiled to the point where it is relatively soft and easy to crush them into some smaller pieces with a wooden sptaula. (This part is crucial since it will determine how moist the cake will turn out. To be safe, I’d boil it a little longer to evaporate more of the water).

Then whisk in baking soda. (It should turn into a brownish charcoal-ish color). Set aside to cool to room temperature. (Or if you were impatient like me.. let it cool down a little and then stick it in the fridge for about 15 minutes)

lumberjack02

In a mixing bowl (not a stand mixer bowl), mix and sift flour, baking powder, and salt. Set aside.

Preheat the oven at 350F.

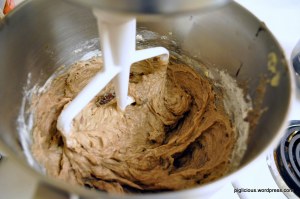
In the stand mixer bowl, cream butter, sugar, vanilla extract, and egg.  Mix until it looks light and airy. This will make the cake fluffier. (Takes at least 3 minutes to mix. I started out with stir level 2 and went up to level 4).

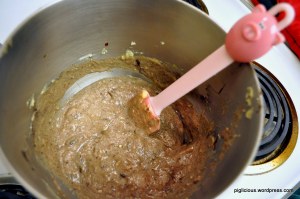
Slowly add the room temperature date mixture and mix at low speed until incorporated.

lumberjack03

Then slowly add dry ingredients also at low speed until blended, careful not to over-mix.

lumberjack04

(The Coconut Flakes that I bought were larger chunks, so I chopped them up a little bit)

Fold in coconut, pear, and apple with a large rubber spatula.

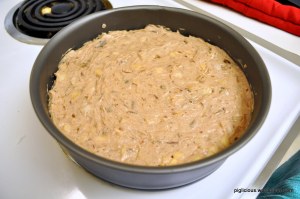
Pour mixture into a greased springform pan(I mildly greased the sides of the pan with some vegetable oil on a paper towel) springform pan. Evenly spread out the batter in the pan and try to smooth out the batter at the top.

You could put a generous layer of white sugar for a crusty top. I tend to not like my cake too sweet, so I just put on a thin layer of powdered sugar.

lumberjack05

Bake at 350 for 45 minutes. Rotate pan in oven, and then continue to bake in for 15 minutes. Insert a clean toothpick into the middle of the cake, and if it comes out clean, the cake is done. If not, rotate pan and continue to bake in 10-minute increments.  (Mine was done after the initial 15 minutes. It may take a little longer to bake if there was more liquid in the date mixture).

lumberjack06

Sprinkle some powdered sugar over the cake.  (The best and most even way to sprinkle is to use a thin strainer or tea strainer).

lumberjack07

lumberjack08

Look at this deliciousness~  Enjoy~~
lumberjack10

August 7, 2012

A Cake Pops Kind of July

by tina

July sure flew by and I’m a bit sad that I lost my monthly posting streak that I had going on–it was a personal goal to post at least once every month. But oh wells. It was a busy month with lots of wedding related festivities. I enjoyed making cake pops 3 times in a month. yay :D

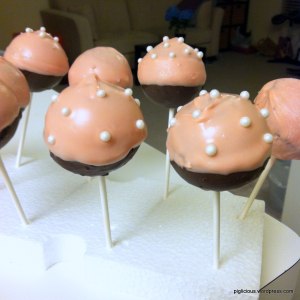
Here’s the evidence.

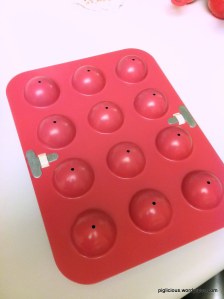
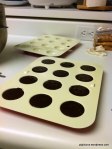
First off, I used this awesome cake pop baking pan

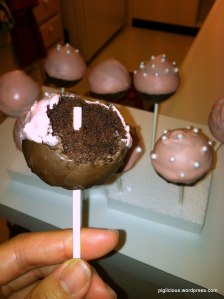
1st round. (first time ever making cake pops!) I followed this cupcake recipe for the batter. I knew the candy coating would contribute a lot to the sweetness of the cake pop, so I cut the sugar of the batter by about a third.

cake pops are hard to dip in the melted candy at first, but then you get the hang of it.  If you’re a cake pop newbie maker like me, I recommend melting the candy over a pot of simmering water rather than microwaving it.  You’ll get a much better consistency this way.  It takes a longer time, but you’ll be much happier, trust me!

Also, I learned that coating the bottom half first, then sticking the popsicle stick in, then letting the bottom half settle/harden first, and then coating the top half is a lot easier than trying to coat the whole thing all at once.

leftover cake batter went to making cupcakes :)

2nd round of cake pops. For a Tiffany’s themed bridal shower. (didn’t use the cake pop pan for 2nd or 3rd round. made it the original way of rolling the cake batter into balls)

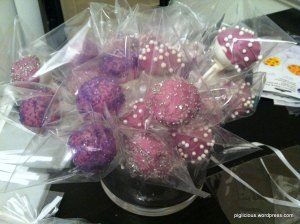
3rd round. For a wedding shower.

We placed them in these cute bags

June 18, 2012

Molten Chocolate Lava Cake

by tina

Happy 1 year anniversary to my blog! :)  Time sure flew by.  All I can say is that it’s been a fabulous year documenting the foods I made!  I’ve been lacking in the crafts area, though–Must work on that.

I can’t think of a better way to celebrate than with a molten chocolate lava cake!

So I had a chocolate craving the other day and had to engorge myself in this simple chocolate molten cake recipe. Although, (I’m not gonna lie..) I’ve had better at a few restaurants, but it’s definitely a great way to satisfy your cravings if you’re stuck at home and want it asap!!!

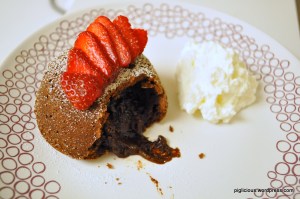
I made this twice and found out that the bake time is a bit sensitive.  The first time I baked it for 13 mins, which was too much and the second time I baked it for 11 mins, which was a lot more molten but I think it might’ve been even better if I took it out at 10 mins :]

Recipe adapted from: Tasty Kitchen

Ingredients:

Cake:

  • 4 custard cups (6 ounces each. I used Pyrex custard cups)
  • 4 squares semi-sweet baking chocolate
  • 1/2 cup butter
  • 1 cup powdered sugar
  • 2 whole eggs
  • 2 whole egg yolks
  • 6 tablespoons all purpose flour
  • vegetable oil

Whipped Cream:

  • 1/2 cup heavy whipping cream
  • 1/2 tablespoon sugar

Directions:

Cake:

Preheat oven to 425 F.

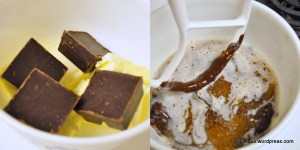
Microwave the chocolate and butter in a large bowl on high for 45 secs, (depends on your microwave wattage) until the butter is melted. Then whisk until the chocolate is completely melted as well.

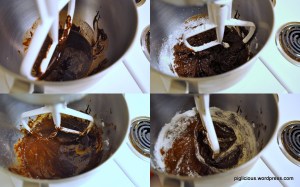
Transfer the chocolate-butter mixture to the mixing bowl and stir in sugar (level 1 on stand mixer) until well blended.  Whisk the eggs and egg yolks in (level 2).  Stir in flour (level 1).  Stop occasionally to make sure the flour isn’t stuck on the sides.

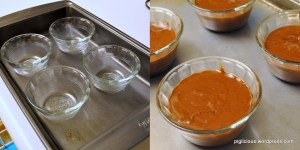
Once the cake mixture ingredients are fully incorporated, prepare the custard cups for baking.

If you don’t have Pam spray, like I didn’t, I dropped 1 dot of vegetable oil in each cup. Then I used a small piece of paper towel to spread the oil around the cups.

Now, divide the cake mixture between the cups (should be about 2/3 filled).  Bake for about 9-11 mins. 

Whipped Cream:

Combine sugar and heavy whipping cream and whip until stiff.

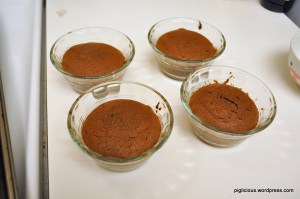
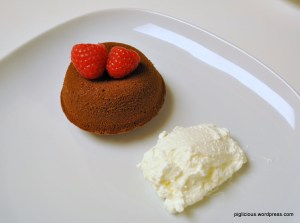
This is how the cakes should look in the cups when they’re done.  The cake should not be too cracked at the top and the “lava” should not be slightly oozing out–If this happens, you’ve probably overbaked them (which is what I experienced the first time I baked these).

Invert the cakes and top them with fruits and the whipped cream :)

Enjoy~!!