Archive for ‘Crafting’

February 14, 2015

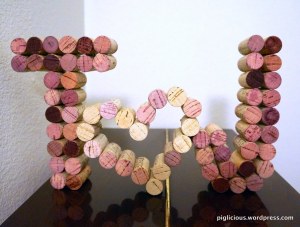
DIY Wine Cork Letters and Heart

by tina

winecorkcraft01

My fiancé and I are getting married later this year at a vineyard, so I started to research what DIY crafts I could make for our wedding decorations! :) I came across many cool DIY wine cork crafting ideas on Pinterest and decided to make one with our initials. There are many letter designs that use a cardboard cutout as the backing where the bottom of the corks are glued onto the cardboard, but I liked the look of the light going through the corks more, so I decided to go with that kind of design.

At first, it seemed easy enough–put the corks in the formation I want, connect them with some wires, and hot glue gun the pieces together. That’s easier said than done. After some trial and error, I finally got it to work.  I initially used a thin wire since the lady at Michaels recommended that. Nope, didn’t work. My initial came out floppy.

I did some more Googling and couldn’t seem to find what others use to make these corks stand stably. I then bought these floral wires on Amazon to experiment, and they worked!

Instructions:

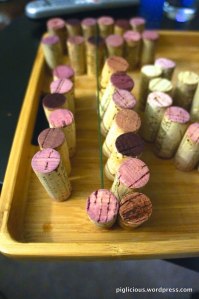
First, form the letters and heart for the way you want them to look.

winecorkcraft02

Start from the inside vertical row of the T.  Measure with a ruler (I measured 7/8 inch) and poke the holes in the cork for where you want the wire to pass through each cork. Do not poke the wire all the way through the bottom cork since you don’t want the wire to show on the bottom, and you want the cork to stand evenly straight next to the other row.

winecorkcraft03

Continue to wire through the 2nd to the top cork. Then cut the wire just enough so that when you poke the top cork, it won’t go through entirely.

winecorkcraft04

Now we go to the outer row of the T. Measure (this time at 1 inch) and poke the wire through. winecorkcraft05

Continue to wire through the 2nd to the top cork and do the same as the other row–Cut the wire just enough so that when you poke the top cork, it won’t go through entirely.

winecorkcraft06

Now wire the bottom horizontal row of the T. Start from the left side. Don’t poke a hole all the way through for the far left cork and wire through the rest of the corks. Cut the wire leaving about 3.8 inch. You’ll notice that there are 2 corks on each side at the top horizontal cork layer, which will just be glued on later.

Continue and wire the heart and J. For the heart, wire through the hole heart with the ends of the wire meeting at the bottom of the heart. Bend the ends of the wire to secure the heart. For the J, only wire the outer cork layer. Leave about 1.5 inches of wire at the end of the hook (to connect to the heart) and like the T, do not wire through the last cork at the top.

winecorkcraft07

In order to connect the “T,” “<3,” and “J” together, poke a piece of wire (about 2.5 inches) on the left of the heart to connect to the “T” and make sure to poke a hole through the connecting cork on the “T.” Doing this beforehand will be easier to connect them later. On the right side of the heart, poke a hole through the connecting cork and the 1.5 inch wire on the “J” should be used to connect to the heart.

winecorkcraft09

Now that all the necessary corks are wired up, we hot glue the corks together. Start with the “T.” Unfortunately, you will have to take apart the “T” in order to glue the right vertical row first and insert the wire that will be connecting to the heart.  Bend that wire to secure it’s position. Glue the left vertical row and then glue the rows together. Finish gluing the top portion of the “T” and bend the wire of the lower horizontal row.  Continue and glue the heart together. Then go on to the “J” by first gluing the outer layer first and then glue the rest of the inside layer to the outside layer.

winecorkcraft08

Now you can insert the “T” to the “<3” and “J” to the “<3.” Once these pieces are all connected, bend the wires that have been poked through the heart!  And you’re finally done.
winecorkcraft10

Tags:
November 10, 2011

Cold Season is here~

by tina

I looked in my winter storage tonight and flipped out all my scarves that I’ve knitted and crocheted throughout the years. =)

A tad bit out of style now. I’m not sure if I’ll be wearing those bright colored ones anymore. He he.
Maybe I’ll wear these…

July 21, 2011

Ribbon Heart

by tina

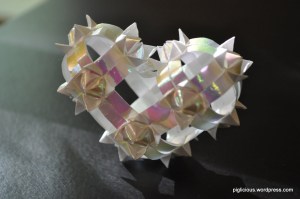
Who knew that you could turn curling ribbon into a beautiful heart!?! 

I learned how to make the individual “flowers” when I was little and only learned to connect two of them together into an oval-ish shape (which definitely is not as fascinating as this heart). It wasn’t until one of my college roommates showed me this awesome way of connecting the flowers together and I’ve been making it for family and friends ever since.

Supplies:

  • 1 curling ribbon (from Michael’s)
  • scissors
  • ruler
  • tweezers

There are a total of 14 “flowers”. For each flower, 4 pieces of ribbon will be needed.  Cut each piece 6 inches long, with the ends cut at an angle (easier to work with for inserting).  Fold each piece in half, with one side a 1/2 inch shorter than the other.  The shiny side of the ribbon should be on the outside.

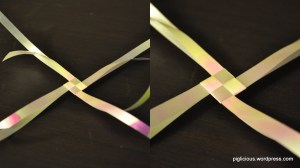
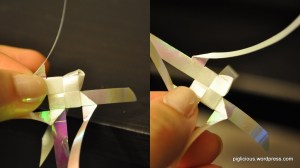
1) Base of the flower: take the 4 pieces, with the short side up, and interlock them together: take the 1st ribbon and place it in between the fold of the 2nd ribbon, counterclockwise.  Continue the same with the 3rd and 4th ribbon, but instead, insert the ends of the 4th ribbon through the 1st ribbon loop.   

Fold the short sides of the ribbons down (non-shiny side showing), clockwise. Interlock by inserting the 4th fold into the 1st loop.

Flip it over to the shiny side and do the same, fold the shorter sides down. The ribbons on the top and bottom (or outside and inside) should be curling outward and in.

2) Flower petals: reorient the piece so that the shorter ribbons are  facing down (bottom) and the longer sides are facing up (top).

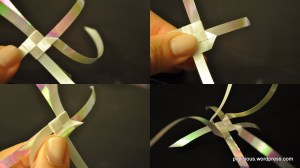
Take the 1st of the long ribbons and fold it outward, into a triangle.  Fold another triangle downward, leaving a little space between the two triangles (non-shiny side showing). Think of it as a bigger triangle now, and fold it in half into two triangles again (3rd picture below).  Repeat for the other 3 ribbons.

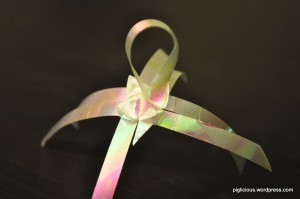
With these creases, we will now create the 3-D triangular petals.  Take the 1st ribbon and insert the end (non-shiny side) into the adjacent slit of the base. Remember the two triangles that you’ve already creased.  Pull the ribbon through and stop at where the right triangle crease meets. At this point, there should be a funnel-like loop of the two triangles facing down. Carefully pinch the two sides of the triangle and flip the two triangles upward.

Repeat for the other 3 ribbons and it should look like the below picture, with all 4 ribbons coming out from the center.

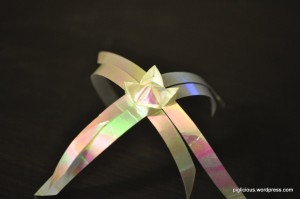
3) Flower center: take the 1st ribbon and insert through the adjacent slit (shiny side showing)and pull it through to  meet the shorter ribbons. (you may need to move the other ribbons to the side in order to insert).  Repeat for the 3 other ribbons. (tweezers may be needed to insert)

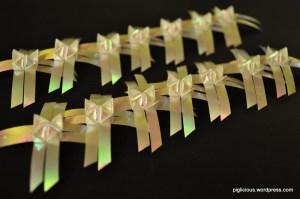
Finished flower!  Now make 13 more :)

The whole process in one picture:

Now we’ve got to put these pieces together to make the heart!

Cut down all sides of the ribbons to 1 inch.

4) Connecting the flowers: using tweezers, connect the pieces together.  There’s a total of 4 ribbons–2 will be on the bottom, and the other 2 will be on the top.   Say that we’re connecting a left and right flower, the left flower has 1 bottom and 1 top ribbon, and the right flower has the opposite 1 bottom and 1 top ribbon.  It is crucial to interlock them this way so that the flowers will stay well connected.

Insert and connect the ones on the bottom first; these bottom ribbons will be inserted into the base and they wont come out from another end.  The length of the ribbon in between the two flowers should be 1/2 inch. Insert the ones on the top and the ribbon should come out a little between the center and the petal. If you have trouble connecting a ribbon, you could cut it a little shorter.

Connect 2 more flowers, making it 4 in a row. (flower #1-#4)

Connect the flower #5 and #6 on both sides to flower #2 and #3 (left picture). Connect flower #7 to #1 and #5 and connect #8 to #4 and #5 (front side). Connect #9 to #1 and #6 and connect #10 to #4 and #6 (back side). (right picture)

Connect #11 to #1, #7, and #9.  Connect #12 to #4, #8, and #10.  Connect #13 to #7, #9, and #11.  Connect #14 to #8, #10, #12, and #13.

*OR, just follow the picture below. The numbers might be too confusing to keep track.

^__^

Tags: